Sunday, December 30, 2012

Cardi Clip

As a serial DIYer I knew that I would DIY some of my Christmas presents. One day, Mina gushed to me about a cardigan clip that she really wanted. Then, I stumbled upon an easy DIY from Refinery29. I knew instantly that I would make that for my closest girlfriends. We all love cardigans and vintage earrings. I ran to the thrift store for clip-on earrings and the craft store for the other tools. Here is the DIY or you can follow the Refinery29 DIY.

What You'll Need:

1. Clip-on earrings
2. Needle-nose pliers
3. Necklack chains
4. Jump rings

Steps:
1. Open the jump rings with the pliers
2. Connect the chains to the clip-ons with the jump rings
3. Close the jump rings with the pliers
4. Clip it on to your cardigan or collar

Mina and Allie loved the present and Allie even blogged about it!

Here are some pictures of the project:

Me working hard on the project.

Holding up the finished project.

These are the clip-on earrings I picked to use for my Christmas present.

Modelling Mina's cardi clip before I gifted it to her.

I wore mine on Christmas. I felt like a modern Mrs. Clause with my red and green combo.

I hope you had a great Christmas! Thanks for reading my blog in 2012 and I'll see you in 2013!

Thursday, December 27, 2012

All Dressered Up

I hope you had a happy holiday! We have a new addition to the booth and it's a blue dresser. When we found it we loved the hardware and agreed right away we would paint it royal blue.

Here are a couple of pictures:


I love the way it turned out and tried to convince Kyle to let me keep it. Alas, I gave in and put it in the booth.

And here is the picture of booth:


Check back next week for a fun fashion DIY!

Thursday, December 20, 2012

Thrifty Gifty

With Christmas right around the corner, I found myself trying to get all of my gift wrapping done. I realized that I needed gift tags. Last year, I cut paint chips into Christmas shapes to use as gift tags. They were really cute, but I wanted to do something different this time. I found this pin on Pinterest and loved it. I thought it was really cool the tags could also double as ornaments after this year. I also decided to modify it a bit based on what I had already. I used a permanent marker instead of paint and I baked them to make sure they dried out properly. This yeilds about 20 gift tags.

Here's the tutorial:

What You'll Need
1. 2 cups of flour
2. 1/2 cup salt
3. 3/4 cup warm water
4. rolling pin
5. cookie cutters
6. permanent markers or paint
7. pen or something to poke hole in the ornament
8. sting, ribbon, or fishing line

Directions:
1. combine the flour, salt and water. Knead it together.
2. Roll out the dough
3. Cut out the dough using the cookie cutters
4. Draw your design on the ornament with the sharpies
5. Poke a hole at the top of the tag
7. Bake at 200 degrees for about 15 minutes or until they look dried out.
8. Put the string through it and tie onto a gift.

Here's the after pictures:


Our puppy Lexus wanted to know what we were doing. I can't wait to give these to others and see them on their trees! It was an easy project that can be reused!


Tuesday, December 18, 2012

Wine + Cheese Please

The weekend before last we hosted a wine and cheese party at our house! We wanted to host a holiday party, but with a different spin. And we love both wine and cheese. So we asked all of our guests to bring, you guessed it, wine and cheese. Then, we made some hors d'oeuvres and did a little bit of decorating. I thought I would share some photos of the party for you.


I found a great pin on Pinterest that had free printables. I printed them off and cut them out. Then, I taped it to some ribbon and hang it on our built-in. I thought it added a little bit of fun to the party!


I picked up this pendant on one of our recent trips to IKEA in the holiday section. I love the way the light shines through it and I will be sad to take it down after the holidays!

You gotta have wine glasses at a wine and cheese party. I always like to use disposable glasses because it can be so tiresome to wash all of those glasses after the party (in addition to cleaning everything else up). I thought a little tower might fancy them up a bit.

We actually got this idea from the Midland holiday party: grapes covered in sugar. It makes them look like they have fresh snow on them. All you do is rinse the grapes (like you usually would before eating) and put them in a plastic bag with sugar. Then you shake it up and you're done! They are festive and oh so delish.

Here is some of our spread, including my cheesecake bites with raspberry topping.


And lastly, our chalkboard with a holiday greeting.


I hope you enjoyed pictures of our holiday party! Later this week I will have a booth update for you!


Tuesday, December 11, 2012

Midland party & booth additions

This past week we celebrated the holiday season at Midland! They had a party for all of the booth owners with delish food and drinks. All of the booth owners got to shop after hours. It was really nice because we spend so much time working on our booth that we rarely have time to look around at the other booths. Here is a photo that sums up some of the fun we had:


On Friday we also came back and did some work. Work hard, play hard. Remember this headboard? Here is a before picture in case you don't:

Well we decided to paint it teal. As most of you know I have a love affair with teal and I was so excited to paint this. Here is the after picture in the booth:


I am really happy with how it turned out! We also added some holiday cheer to the booth. Here is a pretty wreath we added:


And finally, here are a couple of overall pictures of the booth:


Later this week I will have a post about the wine and cheese party we hosted over the weekend!

Thursday, December 6, 2012

Deck the Halls

It's that time of year again, to spread joy throughout your house with some simple decorations! Last year we were on the Pendleton Historic Home Tour so we felt really pressured to decorate. So this year we enjoyed a pressure-free day of decorating filled with holiday music and Christmas spirit.

First, I have a Christmas decoration DIY that I did last year. Here's the guide:

What You'll Need
1. Red and green paint chips in different colors
2. A few different sized round items as templates
3. A pencil
4. Scissors
5. String
6. A glue gun

Directions:
1. Trace the round shapes onto the back of the paint chips.
2. Cut the circles out.
3. Cut the strings to various lengths.
4. Glue the paint chip circles to the string in the same distance.
5. Hang them.

It's really easy and it adds such a festive spirit to something as ordinary as curtains. Here is our hanging up:


And here are the rest of our Christmas decorations:


I love the word ornaments. Not only are they fun, but they send a message too!


Since we had two trees last year, we decided to just go with a little one this year.


The theme of the tree is vintage. I got the lights at an antique store and most of the ornaments are from my great grandma! They are so much closer to my heart because they have meaning to me. Also, notice the sparkly pear and silver spruce sprigs that I featured before?


I hope you enjoyed our decorations. Have a great holiday season!


Tuesday, December 4, 2012

Roll top red

Last week we redid a roll top desk. Little did I know before we had the booth that I had an affinity for roll top desks. I think they are classic and I have been hunting for one. When I spotted this one Craig's List and a block away from where we live, I knew I had to have it. So we picked it up and started painting. Since the red dresser sold so fast, we decided to paint this red as well. Here is the semi-before picture:


We decided to leave the hardware gold and I love the way that it turned out! Here are the after pictures.


We also added a bar cart to the booth.


And finally, here is what the booth looks like now.


Check back later this week for another update on our Christmas decorations at our house!

Wednesday, November 28, 2012

Silver for the Season

Remember when I posted about the Crate and Barrel holiday event? Well it made me realize that this holiday season is all about metallic. I happen to love metallic silver, so I decided that would be the theme of my holiday decorating this year! I got out my silver spray paint and looked for things I could cover in it.

I had been seeing things on Pinterest where you spray paint pinecones. I went outside to our pine tree and picked mini pinecones and a bag full of pine branches. Then, I spray painted the pinecones and some of the pine branches silver. The rest of the branches I left green and used those as decoration too.


The next metallic project was silver glitter pears. I bought the pears at the dollar store for a dollar each. I also bought some spray adhesive for about two dollars and I had some silver glitter. Here are the pears before:

 
First, I spray painted the pears so that if they weren't completely covered in glitter, the yellow wouldn't show through. I used the silver for this. Here are them painted:


Then, I sprayed each one with spray adhesive and rubbed on the glitter. This was a messy project so I suggest doing it in the garage.

And here are the after pictures with all of the decorations put together!


I hope you all have a splendid silver season! Check back in later for more Christmas decorations and a booth update.

Friday, November 23, 2012

Wine & Dine

As the holiday season is upon us, I thought I would share an easy, DIY hostess gift. After we had our housewarming party, I realized how much work it is to throw a party. So I decided to make a hostess gift for my aunt since she was hosting Thanksgiving.

At our Thanksgiving there is usually some wine to enjoy and that's why I decided to make wine tags! I have some wine corks as decoration at home and I used those to make the wine tags.


Here's the DIY:

What you need:
1. Wine corks (8)
2. A needle
3. Pliers
4. Wire cutters (or plant clippers)
5. Straight pins for jewelry (they have an eye)
6. Earring hooks

Directions:
1. Put the needle in the cork to make a starter hole through it. You will need the pliers to pull it out.


2. Put the straight pin through the cork and cut off the excess at the end. Push the extra back in the cork.

 
3. Put the earring holder through the eye.

It's so easy and pretty cheap! You can get most of it in the jewelry section at any big box store. I am looking forward to using some I made for our house at our wine and cheese party! Here's the after pic:


Sunday, November 11, 2012

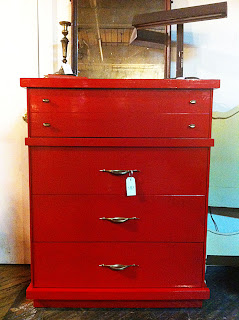
Little red dresser

We found a mid-century modern dresser that we just had to buy for the booth. We didn't want to paint it, but the top was really scratched up and there were some spots on the sides. So we decided to paint it red.

Here is what it looked before:

Like I said, we didn't want to paint it, but you can't really see the wear in this picture.


We loved the hardware, so we kept that the same. We finished painting it this week and put it in the booth. Here is the after picture:


Even though we didn't initially want to paint it, we love the way this piece turned out! And we love giving the booth some pops of color.


And here is what the booth likes now:


Check back in later this week for a post about a holiday event I went to at Crate and Barrel over the weekend!