Tuesday, March 26, 2013

Home History: Built-in

Today I am sharing the second part in series about our home. One of the things we really liked about the living room when we toured the home was the built-in shelving. However, when we tore out the old ceilings to return the ceiling to its original height, we realized the old shelving was too short for the space. So we screwed it to the wall and Kyle and his dad built cabinets underneath. I love the built-in and I think it is a great focal point in the living room. It also houses my books and our relics, which are close to our hearts.

Here is the before picture:


Here are the after pictures (taken by the lovely Kyle Lewis):

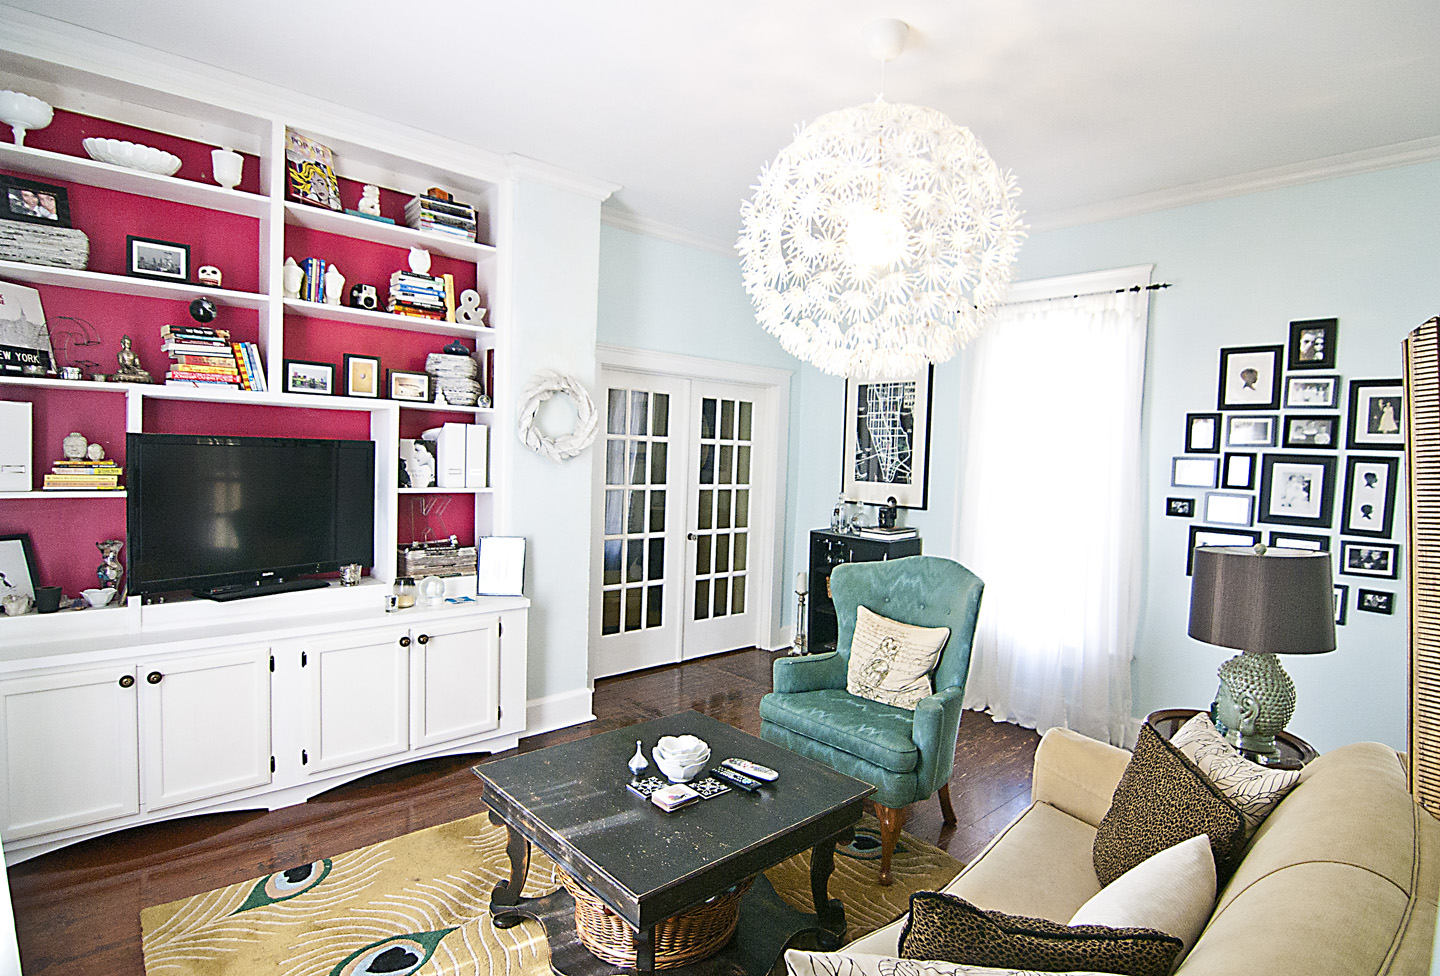
I think the white looks so much better than the wood. It really makes it stand out. I also took a risk here and painted the wall behind the built-in a radish color. Before the built-in was in, I was really regretting it. But in the end, the risk reaped a reward.

My mom had these at work and said they had to go here. I obviously agreed.

Books + owl = love.

I made the wreath with old encyclopedia pages and a wreath form.

In this photo you can see my beloved Buddha lamp and some more Buddhas on the bookshelves.

A reflection of our starburst, flower light.

A metallic Buddha that I bought in New York.

Around our house we love newspapers. Kyle loves them so much he works for two. So when I found these baskets made out of newspapers, I snatched them up.

This is what I call my shelf. It shows my love of travel and NYC. It also holds my letter C.

"A girl should be two things, classy and fabulous." - Coco Chanel (had to incorporate my namesake).

I love our vintage Brownie camera that was a gift from Aeriel and Neil because Kyle is a photographer (see pictures above and below) and the man who invented Brownie cameras was from Pendleton!

Kyle's letter sits on his newspapers and owls from his grandma in his shelf.

I hope you enjoyed seeing on of my favorite things in the house full of our most sentimental tchotchkes. See you soon with a booth update!


Tuesday, March 19, 2013

Love letters

This past week I worked on another wedding DIY. This was project was inspired by my friend Audrie's wedding. She incorporated their initials at the entryway of her venue. I loved the idea and wanted to use it for our wedding as well. I asked Audrie for the tutorial and she said her cousin Sarah was the one who did it. She messaged Sarah and Sarah was nice enough to share the tutorial with me. And now I'm passing it on to you! Here are Audrie's letters, my inspiration:


Here is the tutorial:

What You'll Need:
1. Cardboard Letters - I got mine for $1 a pop at Hobby Lobby
2. Bouquets of fake flowers from the dollar store, I used about 8 boquets
3. A pen
4. Hot glue gun


Directions:
1. Pop the heads off all the flowers. This was surprisingly easy to do.
2. Poke holes in the letters about an inch apart. You can stick some of the flower heads in as you go to know how far to poke the next hole.
3. Glue the flower heads in.

That's it! It is a really easy project and I love the way the flowers look. Here is our finished product:


I can't wait to use these at our wedding. Thanks Audrie and Sarah for sharing! Stay tuned because in my next post I will debuting photos of our built-in in the living room!

Wednesday, March 13, 2013

Home History: Living Room

I have decided to add a new page and series to my blog. As many of you know, before I started this blog, we renovated a historical home in Pendleton. While we were renovating it, that is all I could concentrate on. A blog was just out of the question at that point. However, I think I am ready to share our project with all of you! As I add to the series, I will be adding before and after pictures of each room to the "Our house" page on the blog. You can read the blog posts to see more details and pictures of the makeover.

Today, I am going to start with the living room. The living room was covered in wood paneling  and an outdated ceiling fan. It also turns out that wood paneling is only made in 8 foot panels. To cut down on the cost of buying more wood paneling, they dropped the ceilings from 10 feet down to 8 feet to match the panels. So the first thing we did when we closed on the house was tear out the wood paneling and ceiling.

Here are some before, during and after pictures from different viewpoints:

This is what the living room looked like before we did anything.

Once we tore out the wood paneling, we found plaster. We then had to tear out the plaster to put up drywall.

This is the lattice work (always under plaster as a base) and a few sheets of drywall.

And finally, here is the after. We added drywall, painted, and added furniture. I think the taller ceilings also really help.

Here is another view point:
I was so excited that I had Kyle take a picture of me in every room. So you get to look forward to several balloon pictures of me in this series. You can also see the nasty ceilings here.

The ceilings are still low in this picture. If you look at the window in this picture and the next two pictures you can see what a difference two feet make.


And lastly, here are two other after pictures:
We also redid the built-in, which is what I am going to post about in the next addition of this series.

In the meantime, if you have any questions about our renovation or any of the furniture (which we mostly upcycled), please leave a comment!


Wednesday, February 27, 2013

A side of modular

This week we added a pretty rad side table. It is mid-century modern with a cool modular shape. I love the glass top and of course the shape. We decided to paint it black since it was so sleek already. Here is what it looked like before:
While it doesn't look that bad in this picture, it actually needed a great deal of sanding. It had several rough patches, especially in the curves.

Here is what it looks like after in the booth:
We found that vintage, wooden school bus and it think it looks pretty cute with the side table.

We also added this awesome golden clock with curvy lines.
The clock is sitting on our suit chair. The suit char has a place for a business man OR woman to hang their suit jacket. It is a chair so they have a place to take off their shoes and it even has a spot for cufflinks.

Lastly, here is what the booth looks like this week:

Next week I am going to debut a new page/series on the blog! I can't wait to share it with you!

Saturday, February 23, 2013

With this frame, I be wed

When we created our black and white family picture wall in our house I decided that I wanted to incorporate wedding pictures of our relatives in our wedding somehow. So recently, I set out to find frames that I would like to frame the pictures in. I went to my usual shopping spots, thrift shops and Goodwill. I slowly collected frames I liked and then decided to paint them teal to match our wedding colors. Here is the DIY tutorial for painting frames:

What You'll Need:
1. Frames
2. Paint and brush (or spray paint)
3. Glass cleaner
4. Newspaper

Directions:
1. Take the back and glass out of the picture frame and put on newspaper. This will make it much easier to paint. Here is a picture of my frames before:


2. Paint the picture frames. I only put one coat on because I wanted the gold to show through the teal a little.
3. While you're letting them dry, clean the glass (since these are from thrift shops they tend to be dust city). Here is a picture of the frames drying:


4. Put the frame back together with the picture.

Here is the finished product with a picture of my grandparents:


It's a really easy process with only a few items. It was a cheap project that is really sentimental. Stay tuned, later this week we will have a booth update!

Monday, February 18, 2013

We speak French

Recently, I was lucky enough to find an amazing french provincial dresser. I knew as soon as I saw it that I would buy it. And the best part was that we only had to do a couple of touch-ups to it. Here is what it looks like in the booth:

I asked Kyle to keep it, but he was once again the voice of reason.

We also painted another coffee table black. It has really cool spindles on the bottom that I think makes it look very regal. Here is the coffee table in the booth:


Lastly, here is what our booth looks like now:


I hope you had a good weekend! As promised, I will have a wedding DIY for you later this week!

Wednesday, February 13, 2013

Saturday Switch-up

This Saturday when we went to the booth, we knew we wanted to rearrange everything. I wasn't really feeling where the chair was and I wanted a fresh look in the booth. So we started moving.

We also added a two-tiered, mid-century modern side table that we painted gloss black. Here is what the side table looked like before:


And here is the after in the booth:


I love how the chinoiserie lamp looks on the side table!

And lastly, here is how the booth looks after the great Saturday Switch-up:


On another note, we have been working hard on the wedding, which is just three short months away. Next week I am hoping to have another wedding DIY for you.