Wednesday, May 8, 2013
Here comes the bride
Hey guys! Sorry my blogging has been so sparse recently. Just in case all of you didn't know, I am getting married on Saturday!! After that, I plan to flood you with wedding DIYs and booth updates with all of my new found free time! Until then, please explore our wedding website/app.
Thursday, April 25, 2013
Armoired and Dangerous
This piece I am about to share with you is one of my favorite pieces we have ever put in the booth. It is a classic mid-century modern armoire. This would look beautiful in a bedroom or it could serve as a luxurious bar. If Kyle would have let me keep this, I would have in a heartbeat. Alas, the first world problems of a booth owner.
Without further adieu, here it is:


I am in love. Here is what the booth looks like with the armoire in it:

Don't you just love it? On another note, stay tuned for another bridal DIY soon.
Without further adieu, here it is:


I am in love. Here is what the booth looks like with the armoire in it:

Don't you just love it? On another note, stay tuned for another bridal DIY soon.
Tuesday, April 23, 2013
Crafty Cards
Sorry for the long hiatus! I have been so engulfed with the wedding and I have wedding projects coming out of my ears. I had my bridal shower and we are working on editing those photos and putting them up on the blog with some DIYs. Meanwhile, I wanted to share a DIY that I did recently.
After the shower, I wanted to send out the first round of thank you cards. We debated on having Kyle design them to match the invitations. However, the printing was going to be pretty expensive. So I came up with an alternate idea. I found a monogram stamp at Micheal's for $1 and had an ah-ha moment. I could buy classy, but simple cards at a place like Target and stamp each one with the monogram stamp.
Here are my supplies:

And here is the after:

I love that it is more personal than just a store bought thank you note. And you don't have to use it for a wedding, a thank you note is always nice! Stay tuned (hopefully soon) for pictures and DIYs from my bridal shower!
Wednesday, April 3, 2013
Churchy Cheer-Up
We added a new desk to the booth that we painted red. Kyle's dad found it at their church. Everyone wanted to throw it away, but he thought of us. We immediately snatched it up. It just needed some TLC. It's a really large desk that has some cool quirks. For example, you have to open the top, middle drawer to open the other drawers. That way, it's harder for others to just rifle through your desk.
Here is what it looked like before:

Here are a couple of after pictures of it in the booth:


Here is what the booth looks like this week:

We just sold the french provincial dresser, so we will be adding a new piece soon that I am SO excited to share with you. It is awesome. I have also been working on wedding projects like craaaaaazy, so stay tuned for some more DIY tutorials.
Tuesday, March 26, 2013
Home History: Built-in
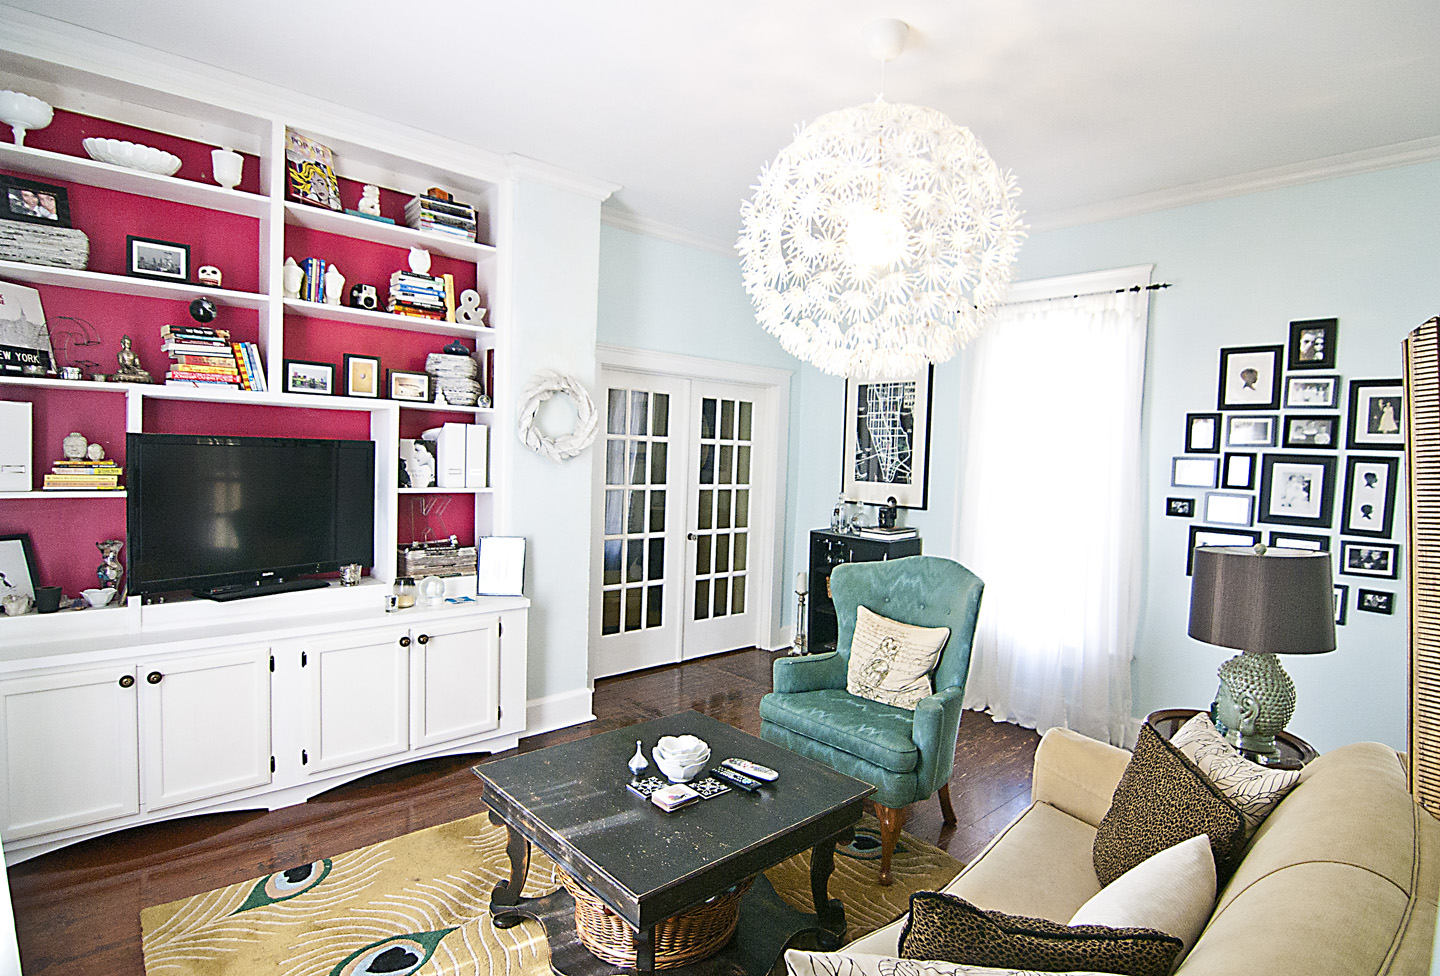
Today I am sharing the second part in series about our home. One of the things we really liked about the living room when we toured the home was the built-in shelving. However, when we tore out the old ceilings to return the ceiling to its original height, we realized the old shelving was too short for the space. So we screwed it to the wall and Kyle and his dad built cabinets underneath. I love the built-in and I think it is a great focal point in the living room. It also houses my books and our relics, which are close to our hearts.

Here are the after pictures (taken by the lovely Kyle Lewis):


Here is the before picture:

Here are the after pictures (taken by the lovely Kyle Lewis):

I think the white looks so much better than the wood. It really makes it stand out. I also took a risk here and painted the wall behind the built-in a radish color. Before the built-in was in, I was really regretting it. But in the end, the risk reaped a reward.

My mom had these at work and said they had to go here. I obviously agreed.

Books + owl = love.

I made the wreath with old encyclopedia pages and a wreath form.

In this photo you can see my beloved Buddha lamp and some more Buddhas on the bookshelves.

A reflection of our starburst, flower light.

A metallic Buddha that I bought in New York.

Around our house we love newspapers. Kyle loves them so much he works for two. So when I found these baskets made out of newspapers, I snatched them up.

This is what I call my shelf. It shows my love of travel and NYC. It also holds my letter C.

"A girl should be two things, classy and fabulous." - Coco Chanel (had to incorporate my namesake).

I love our vintage Brownie camera that was a gift from Aeriel and Neil because Kyle is a photographer (see pictures above and below) and the man who invented Brownie cameras was from Pendleton!


Kyle's letter sits on his newspapers and owls from his grandma in his shelf.
I hope you enjoyed seeing on of my favorite things in the house full of our most sentimental tchotchkes. See you soon with a booth update!
Tuesday, March 19, 2013
Love letters
This past week I worked on another wedding DIY. This was project was inspired by my friend Audrie's wedding. She incorporated their initials at the entryway of her venue. I loved the idea and wanted to use it for our wedding as well. I asked Audrie for the tutorial and she said her cousin Sarah was the one who did it. She messaged Sarah and Sarah was nice enough to share the tutorial with me. And now I'm passing it on to you! Here are Audrie's letters, my inspiration:


Here is the tutorial:
What You'll Need:
1. Cardboard Letters - I got mine for $1 a pop at Hobby Lobby
2. Bouquets of fake flowers from the dollar store, I used about 8 boquets
3. A pen
4. Hot glue gun

Directions:
1. Pop the heads off all the flowers. This was surprisingly easy to do.
2. Poke holes in the letters about an inch apart. You can stick some of the flower heads in as you go to know how far to poke the next hole.
3. Glue the flower heads in.
That's it! It is a really easy project and I love the way the flowers look. Here is our finished product:


I can't wait to use these at our wedding. Thanks Audrie and Sarah for sharing! Stay tuned because in my next post I will debuting photos of our built-in in the living room!
Wednesday, March 13, 2013
Home History: Living Room
I have decided to add a new page and series to my blog. As many of you know, before I started this blog, we renovated a historical home in Pendleton. While we were renovating it, that is all I could concentrate on. A blog was just out of the question at that point. However, I think I am ready to share our project with all of you! As I add to the series, I will be adding before and after pictures of each room to the "Our house" page on the blog. You can read the blog posts to see more details and pictures of the makeover.
Today, I am going to start with the living room. The living room was covered in wood paneling and an outdated ceiling fan. It also turns out that wood paneling is only made in 8 foot panels. To cut down on the cost of buying more wood paneling, they dropped the ceilings from 10 feet down to 8 feet to match the panels. So the first thing we did when we closed on the house was tear out the wood paneling and ceiling.


Today, I am going to start with the living room. The living room was covered in wood paneling and an outdated ceiling fan. It also turns out that wood paneling is only made in 8 foot panels. To cut down on the cost of buying more wood paneling, they dropped the ceilings from 10 feet down to 8 feet to match the panels. So the first thing we did when we closed on the house was tear out the wood paneling and ceiling.
Here are some before, during and after pictures from different viewpoints:

This is what the living room looked like before we did anything.

Once we tore out the wood paneling, we found plaster. We then had to tear out the plaster to put up drywall.

This is the lattice work (always under plaster as a base) and a few sheets of drywall.

And finally, here is the after. We added drywall, painted, and added furniture. I think the taller ceilings also really help.
Here is another view point:

I was so excited that I had Kyle take a picture of me in every room. So you get to look forward to several balloon pictures of me in this series. You can also see the nasty ceilings here.

The ceilings are still low in this picture. If you look at the window in this picture and the next two pictures you can see what a difference two feet make.


And lastly, here are two other after pictures:

We also redid the built-in, which is what I am going to post about in the next addition of this series.
In the meantime, if you have any questions about our renovation or any of the furniture (which we mostly upcycled), please leave a comment!
Subscribe to:
Posts (Atom)