Wednesday, February 27, 2013

A side of modular

This week we added a pretty rad side table. It is mid-century modern with a cool modular shape. I love the glass top and of course the shape. We decided to paint it black since it was so sleek already. Here is what it looked like before:
While it doesn't look that bad in this picture, it actually needed a great deal of sanding. It had several rough patches, especially in the curves.

Here is what it looks like after in the booth:
We found that vintage, wooden school bus and it think it looks pretty cute with the side table.

We also added this awesome golden clock with curvy lines.
The clock is sitting on our suit chair. The suit char has a place for a business man OR woman to hang their suit jacket. It is a chair so they have a place to take off their shoes and it even has a spot for cufflinks.

Lastly, here is what the booth looks like this week:

Next week I am going to debut a new page/series on the blog! I can't wait to share it with you!

Saturday, February 23, 2013

With this frame, I be wed

When we created our black and white family picture wall in our house I decided that I wanted to incorporate wedding pictures of our relatives in our wedding somehow. So recently, I set out to find frames that I would like to frame the pictures in. I went to my usual shopping spots, thrift shops and Goodwill. I slowly collected frames I liked and then decided to paint them teal to match our wedding colors. Here is the DIY tutorial for painting frames:

What You'll Need:
1. Frames
2. Paint and brush (or spray paint)
3. Glass cleaner
4. Newspaper

Directions:
1. Take the back and glass out of the picture frame and put on newspaper. This will make it much easier to paint. Here is a picture of my frames before:


2. Paint the picture frames. I only put one coat on because I wanted the gold to show through the teal a little.
3. While you're letting them dry, clean the glass (since these are from thrift shops they tend to be dust city). Here is a picture of the frames drying:


4. Put the frame back together with the picture.

Here is the finished product with a picture of my grandparents:


It's a really easy process with only a few items. It was a cheap project that is really sentimental. Stay tuned, later this week we will have a booth update!

Monday, February 18, 2013

We speak French

Recently, I was lucky enough to find an amazing french provincial dresser. I knew as soon as I saw it that I would buy it. And the best part was that we only had to do a couple of touch-ups to it. Here is what it looks like in the booth:

I asked Kyle to keep it, but he was once again the voice of reason.

We also painted another coffee table black. It has really cool spindles on the bottom that I think makes it look very regal. Here is the coffee table in the booth:


Lastly, here is what our booth looks like now:


I hope you had a good weekend! As promised, I will have a wedding DIY for you later this week!

Wednesday, February 13, 2013

Saturday Switch-up

This Saturday when we went to the booth, we knew we wanted to rearrange everything. I wasn't really feeling where the chair was and I wanted a fresh look in the booth. So we started moving.

We also added a two-tiered, mid-century modern side table that we painted gloss black. Here is what the side table looked like before:


And here is the after in the booth:


I love how the chinoiserie lamp looks on the side table!

And lastly, here is how the booth looks after the great Saturday Switch-up:


On another note, we have been working hard on the wedding, which is just three short months away. Next week I am hoping to have another wedding DIY for you.

Wednesday, February 6, 2013

Throwback Thursday

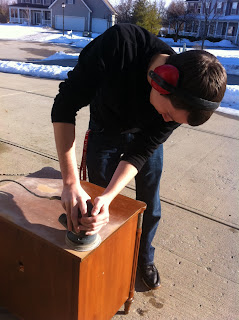
On this Throwback Thursday I decided to share with you a side table/cabinet that we redid a long, long time ago. This is one of the first pieces of furniture we purchased and painted. It was also the first time we used oil-based, high gloss paint. This piece started our love affair with oil-based paint and inspired us to keep redoing furniture. It's current home is in our bedroom. Here is what it looked like before:

We bought it for $5 at DAV, what a steal!

Always use hearing protection when sanding ;)

Here is what it looks like now:

I think my "See No Evil, Hear No Evil, Speak No Evil" owls accent it well.

I hope you enjoyed are blast from the past and have a great weekend!


Tuesday, February 5, 2013

Blue waterfall

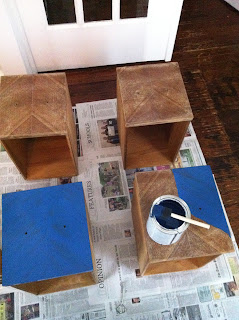
We found a beautiful art deco waterfall (they call it waterfall because the way the top curves makes it looks like a waterfall) desk at Goodwill. It was a little more than we usually spend on pieces, but we loved it. The drawers were in great condition, but unfortunately the top was not. So we decided to paint it royal blue. Therefore, we now have a blue waterfall to gaze at in our booth. Here is a picture of the drawers before:

The drawers had a really cool pattern in the wood grain, so I decided to paint with the wood grain. Here are some after pictures in the booth:

Sorry about the quality, it was really dark outside that day, so the light was pretty bad in the booth.

We have actually sold the red rolltop desk since we took this picture!

And here is it looks like in the booth:


Later this week I am going to share with you one of our first projects for the house. It's going to be a blast from the past!